LiveAssist Configuration
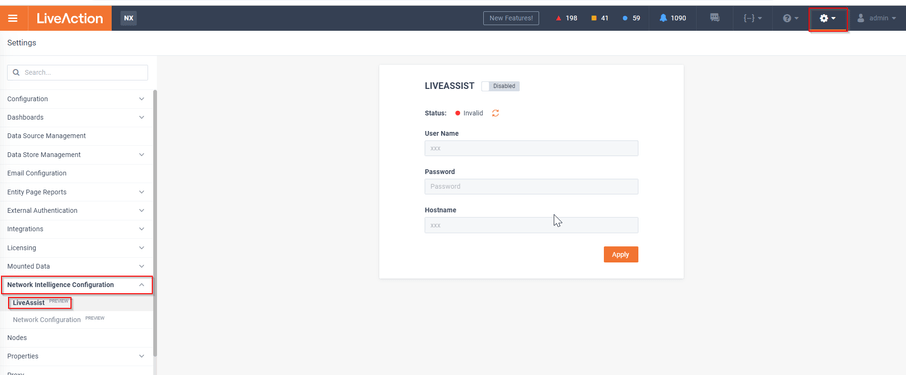
1. Login to LiveNX web as an Admin user.
2. Navigate to Settings>Network Intelligence Configuration>LiveAssist.
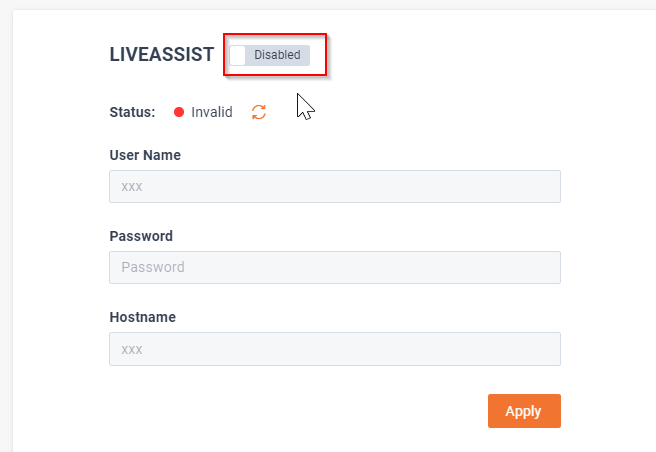
3. Click on toggle button to enable LiveAssist.
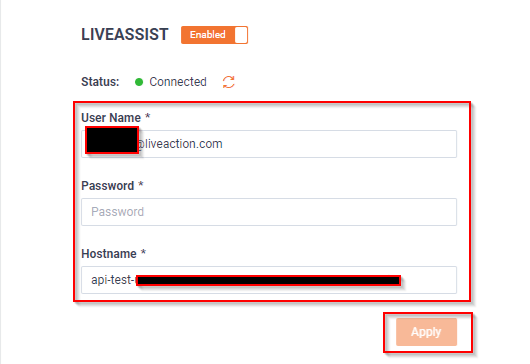
4. Enter the Username, Password, and Hostname received from LiveAction Support and click on .
LiveAssist Network Configuration. (Communication, Service Enablement, and Historical Alert Synchronization)
NOTE: The following steps will enable the OTEL Collector on the LiveNX server and send all historical alerts to the LiveAction Platform. Prior to this step, it is recommended that historical alerts be cleared. If you have more than 10,000 alerts, please contact LiveAction customer support.
1. From the LiveNX web interface, click on the curly brace menu in the top navigation bar and select API Token Management from the dropdown menu.

2. Click on the button to generate an API token.
3. Copy the API Token to the clipboard and keep it as it will be required in the next step.

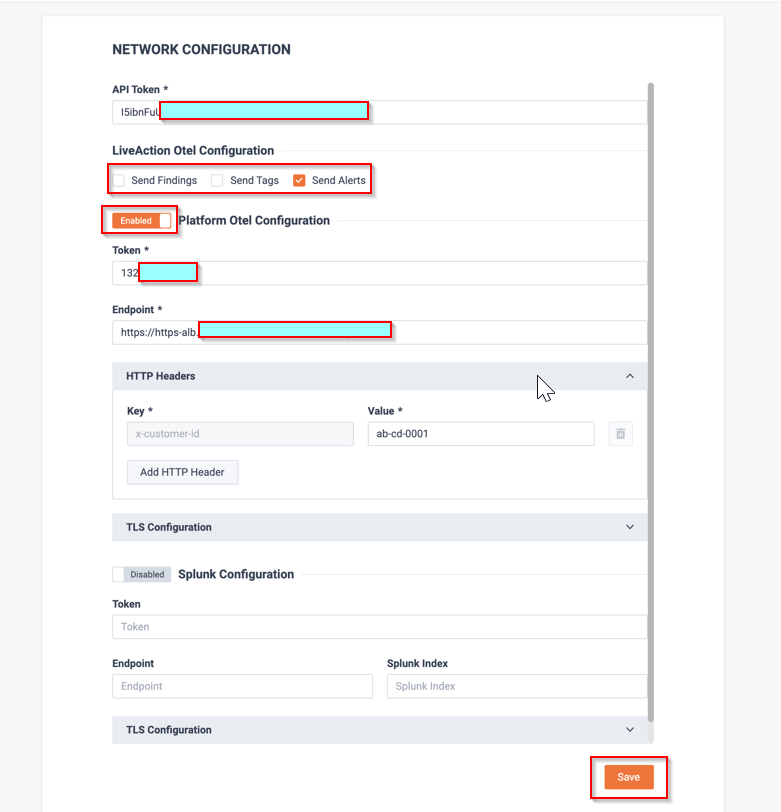
4. On the LiveNX web interface, navigate to Settings>Network Intelligence>Network Configuration.
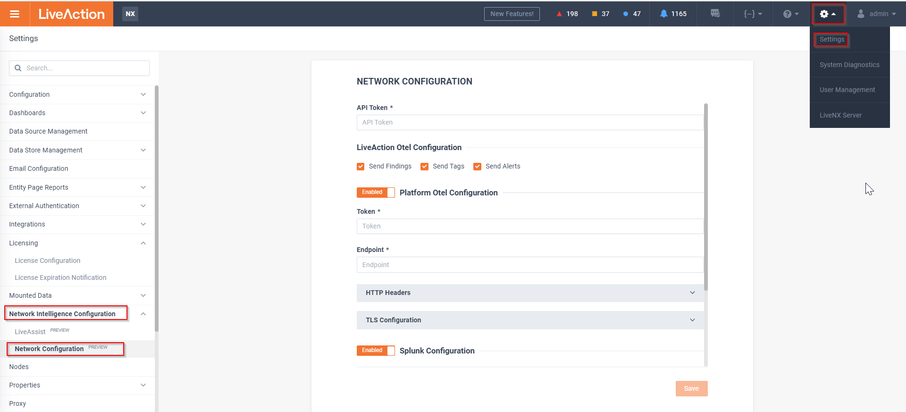
5. On the configuration page, enter the details and click the Save button.
◦ API Token: The LiveNX API token created in the previous step.
◦ Check the boxes for Send Findings, Send Tags, and Send Alerts.
◦ Click the toggle button to the settings.
◦ Token: Provided by LiveAction Support.
◦ Endpoint: Provided by LiveAction Support upon request.
◦ HTTP Headers Configuration: Provided by LiveAction Support upon request
